The Defend-O-Tron supports two separate firmware update paths, each for a different situation:
- Routine in-place firmware updates are done from the admin interface. The Defend-O-Tron pulls a new firmware image, stages it on the device, and switches over on the next reboot. This is the day-to-day path you'll use to keep the appliance current.
- Full SD card flashing is for first-time installation, or for recovery if the device has been damaged badly enough that the rollback option in the admin interface can't fix it.
The Defend-O-Tron also receives routine Debian package updates as shown on the admin interface under Software Updates. Those keep the underlying operating system patched and are separate from firmware-image updates — both are safe to run, both happen alongside each other.
¶ Routine Firmware Updates — From the Admin Interface
¶ Where to find it
Open the admin interface and look for Firmware Image in the Cockpit sidebar on the left.

¶ What you'll see
¶ Idle (up to date)
When there's nothing to do, the page shows a Current state card listing the running firmware version and a Last result of up-to-date. You don't need to do anything — the Defend-O-Tron checks for new firmware on its own once a week.

¶ When an update is available
A blue Update available card appears with the firmware version on offer and a Download & stage button.

¶ Installing a firmware update
-
Click Download & stage.
- You may be asked to confirm your admin password the first time you do this in a session.
- A progress bar fills as the new firmware downloads to the device. Downloads are typically around 750 MB and take a few minutes on a normal broadband connection.
-
Once the download finishes, an Image staged card appears. The new firmware is on the device but hasn't taken over yet — your current firmware is still running.

-
Click Apply. This tells the Defend-O-Tron to use the new firmware on the next reboot.
-
Reboot the Defend-O-Tron when convenient — use the Reboot button on the Cockpit Overview page.
The previous firmware stays on the device after you apply a new one. If anything goes wrong, you can switch back to it — see Rolling back firmware below.
¶ Banner colours at a glance
The page shows a banner across the top whenever something important happens:
- Blue — there's an action available (firmware update offered, image staged).
- Green — an action just succeeded (firmware applied, rolled back).
- Red — something failed. The banner explains what.
¶ Rolling back firmware
Two ways to undo a firmware change:
- Previous version — once you've applied a new firmware, the one you were running before stays installed on the device. You can switch back to it without re-downloading anything.
- Factory image — the firmware your Defend-O-Tron originally shipped with is always preserved and always available as a fallback. Click Roll back to factory at the bottom of the page if you need a last-resort recovery point.
Both rollback options require a reboot to take effect.
Firmware rollback is intended for problems you discover after an update — for example, a setting that didn't carry over cleanly. It's not a substitute for cabling the device out of your network if you suspect a serious issue.
¶ Automatic firmware checking
The Defend-O-Tron checks the firmware server once a week on its own. You don't need to remember to check — just open the Firmware Image page when it's convenient. If an update was found between checks, the blue Update available card will be waiting.
¶ Full SD Card Flashing — Recovery and First Install
You only need this section if you're setting up a new device for the first time, recovering from a problem the admin interface can't fix, or wiping a device for redeployment. For routine firmware updates, use the in-place method above.
¶ Imaging Utility
You'll require an SD card imaging utility to start and a microSD card, preferrably 16GB - 32GB.
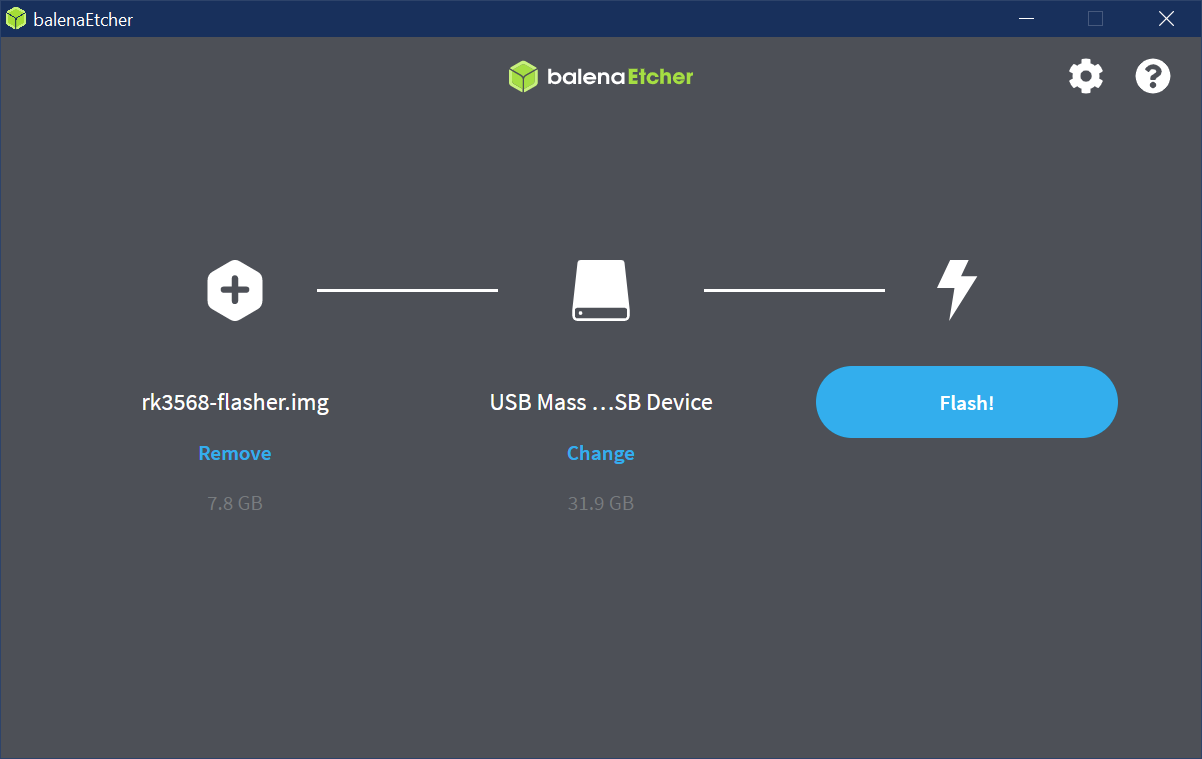
¶ Download Etcher
You can download the Etcher utility from here https://etcher.balena.io and install it.
¶ Firmware Downloads
¶ Images
The firmware images for the Defend-O-Tron can be downloaded from here https://firmware.awesome-o.cloud
Firmware:
- defend-o-tron-latest.img* files are the most up to date firmware for v100 units
- Others TBD
¶ Preparing to flash
Download the firmware image and burn it to the microSD card (at least 16G) with Etcher.
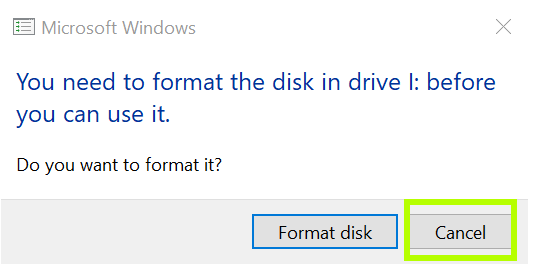
Once Etcher is complete flashing the SD card, Windows may display a disk and give a popup window saying each disk is un-recognized, click cancel.
If you accidentally click format disk you will have to re-flash the SD card again with Etcher.
¶ eMMC MASK ROM
The MASK ROM button allows the Defend-O-Tron to bypass booting from the internal eMMC disk and look for a bootable SD card instead.
This serves a few purposes:
- It allows you to flash the device from the SD card when there's already an operating system loaded on the internal eMMC.
- It allows you to recover from a disk failure, more specifically if the NVME data disk gets corrupted.
- It makes the Defend-O-Tron almost completely "brick" proof as you'll always be able to boot from the SD card, even if the internal eMMC gets corrupted.
The Mask ROM feature is meant to be protected physically. Keep the device secured and away from any unauthorized personnel who could access it with this method. Gaining physical access to any device, not just the Defend-O-Tron can allow bad actors to penetrate or exploit your security equipment.
¶ Steps for flashing
You have to mask boot the device with the SD card inserted correctly in the slot, which is located on the side of the unit. This is best done with a monitor, keyboard and mouse attached.
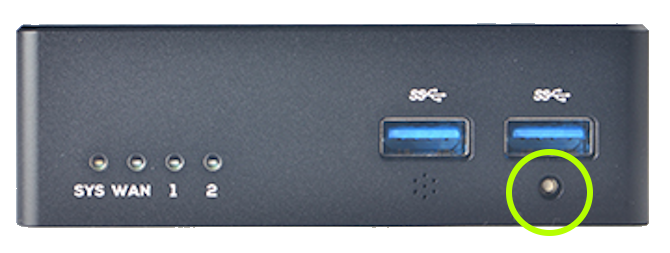
The eMMC MASK button is located on the side for revision 1 of the unit.
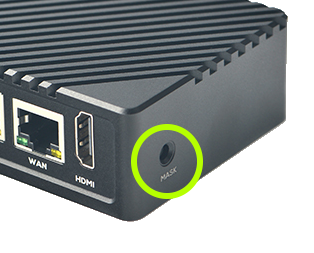
The eMMC MASK button is located on the front for revision 2 of the unit.
- Power off the device, the power cord has a switch
- Insert the prepared SD card into the slot on the side of the unit
- Hold the MASK button down and power on, an unbent paperclip works well
- Wait for at least 3 seconds before releasing the MASK button
- The screen should show the icon/button of the Defend-O-Trom firmware on the main screen. (If you have an HDMI monitor connected)
- The Defend-O-Tron will reboot a couple times to complete the installation
¶ Progress and completion
Do not cancel the process or it will leave your Defend-O-Tron in an unstable and/or unusable state
When the setup is completed you can browse to the admin interface and continue with the admin-interface setup.